Photo editing with Lightroom presets streamlines workflow and establishes a consistent visual style, but their true value emerges when applied thoughtfully, not just as one-click solutions. Understanding how to integrate presets into a broader editing process transforms them from mere filters into powerful tools for creative control and efficiency. This guide details the proper application of presets, ensuring they enhance images rather than dictate an unrefined aesthetic.
Understanding Lightroom Presets
Lightroom presets are pre-configured sets of adjustments that can be applied to an image with a single click. These adjustments encompass a wide range of parameters, including exposure, contrast, highlights, shadows, white balance, color saturation, tone curves, sharpening, and noise reduction. They function as a starting point or a stylistic overlay, designed to accelerate the editing process by applying a consistent look or correcting common issues across multiple photographs.
Key Function: Expedite consistent image processing and stylistic application.
Types of Presets and Their Applications
Presets vary significantly in their intent and effect. Recognizing these categories helps in selecting the right tool for a specific image or project:
- Stylistic Presets: Designed to impart a specific aesthetic, such as vintage, cinematic, moody, or vibrant. These often involve complex color grading, split toning, and tone curve adjustments.
- Corrective Presets: Focus on rectifying common photographic issues, like exposure imbalances, white balance errors, or lens distortions. They aim for a neutral, accurate starting point.
- Niche/Genre-Specific Presets: Tailored for particular types of photography, such as portraits, landscapes, weddings, or food. These leverage adjustments commonly effective within those genres (e.g., skin tone enhancements for portraits, sky enhancements for landscapes).
- Utility Presets: Perform single, specific tasks, such as applying a specific sharpening level, grain effect, or vignette. These are often used in conjunction with other presets or manual adjustments.
Installing Lightroom Presets
Before applying presets, they must be installed correctly within Lightroom. The process differs slightly between desktop and mobile versions.
Desktop Installation (Lightroom Classic & Lightroom CC)
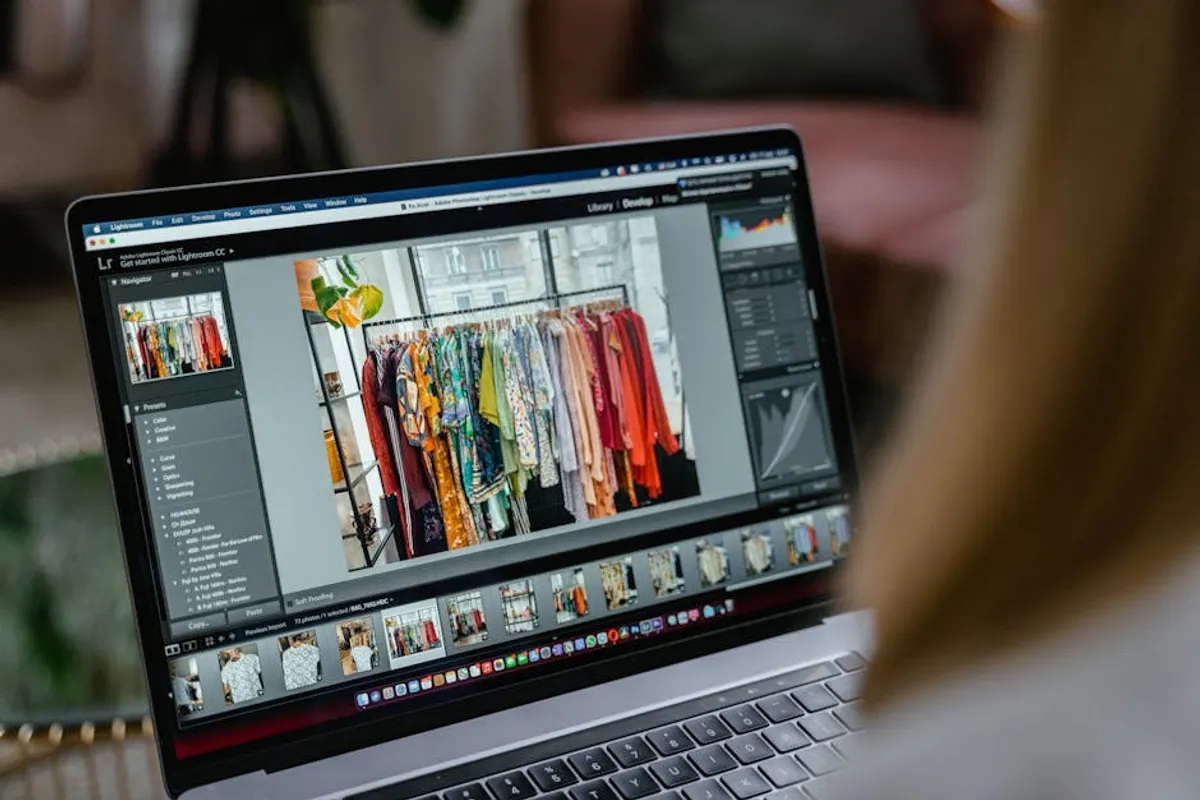
For Lightroom Classic, navigate to the Develop module. In the left panel, locate the "Presets" section. Click the "+" icon next to "Presets" and select "Import Presets." Browse to your downloaded preset files (often.xmp format) and import them. For Lightroom CC (cloud-based), the process is similar: go to the "Edit" panel, click the "Presets" icon, then the three dots menu, and "Import Presets."
Mobile Installation (Lightroom Mobile)
Mobile presets are typically distributed as DNG files. Import these DNG files into your Lightroom Mobile app. Once imported, open each DNG image, tap the "Presets" icon, then the three dots menu, and "Create Preset." Name your preset and select the desired settings to include. This saves the DNG's adjustments as a reusable preset within your mobile library.
Applying Presets Effectively: Beyond the One-Click
The true art of using presets lies in their intelligent application and subsequent refinement. A preset should serve as a foundation, not a final solution.
Initial Application and Assessment
Start with a raw image file whenever possible. Raw files retain significantly more data, allowing for greater flexibility in adjustments compared to JPEGs. Apply a preset that aligns with your desired aesthetic or correction. Immediately assess the result. Does it improve the image? Does it introduce unwanted effects? Pay close attention to exposure, white balance, skin tones, and overall mood.
Essential Fine-Tuning Steps
After applying a preset, almost every image will require individual adjustments. This is where "properly" using presets truly comes into play:
- Exposure and Contrast: These are fundamental. A preset might over- or underexpose your specific image, or introduce too much/too little contrast. Adjust the "Exposure" and "Contrast" sliders to achieve a balanced look.
- White Balance: Presets often include a white balance setting, but ambient light conditions vary wildly. Use the "Temp" and "Tint" sliders, or the eyedropper tool, to correct any color casts and ensure accurate white balance.
- Highlights and Shadows: Recover detail in blown-out highlights or crushed shadows. Adjusting these sliders can dramatically improve dynamic range and visual appeal.
- Color Adjustments (HSL/Color Mixer): Presets can sometimes over-saturate or shift specific colors. Use the HSL (Hue, Saturation, Luminance) or Color Mixer panels to fine-tune individual colors without affecting the entire image. For example, desaturate overly vibrant greens or adjust the hue of reds.
- Clarity, Texture, Dehaze: These global adjustments significantly impact the perceived sharpness and depth. Use them sparingly and intentionally to add punch or reduce atmospheric haze.
- Sharpening and Noise Reduction: Apply sharpening appropriate for the image content and output size. Address any digital noise, especially in high ISO images, using noise reduction tools. Presets often include these, but they need to be tailored to each photo.
Pro Tip: When fine-tuning, always make adjustments with a critical eye, zooming in to 100% to check for artifacts or over-processing. A preset that looks good at first glance can reveal issues upon closer inspection.
Batch Editing Considerations
Presets excel in batch editing. Apply a chosen preset to a selection of similar images (e.g., from the same shoot under consistent lighting). Then, synchronize a few key adjustments (like white balance or exposure) across the batch. Finally, review each image individually for minor, localized refinements. This combines efficiency with precision.
Avoiding Common Preset Pitfalls
Using presets mindfully prevents common editing errors:
- Over-reliance: Do not expect a preset to magically fix a poorly composed or exposed photograph. Presets enhance, they do not salvage.
- Ignoring White Balance: Many presets include a white balance setting that may not suit your image's specific lighting. Always check and adjust white balance first, or immediately after applying the preset.
- Applying to Unsuitable Images: A preset designed for bright, airy portraits will likely look jarring on a moody landscape. Match the preset's intended aesthetic to your photo's content and mood.
- Neglecting Fine-Tuning: The most significant mistake is assuming the preset is the final step. Without individual adjustments, images can look generic or artificial.
Mastering Your Workflow with Presets
Integrating presets effectively means understanding their role as a powerful assistant in your editing process. They save time, promote consistency, and offer creative inspiration, but they demand a discerning eye and a willingness to refine. By treating presets as intelligent starting points rather than definitive endpoints, photographers gain greater control over their final images, achieving a polished and personalized aesthetic.
Frequently Asked Questions
Can I use presets on JPEG files?
Yes, presets can be applied to JPEG files. However, JPEG files have less dynamic range and color information compared to raw files, meaning the adjustments may not be as flexible or produce as clean results without introducing artifacts.
How do I create my own presets in Lightroom?
After you've manually edited an image to your desired look, go to the "Develop" module (Lightroom Classic) or "Edit" panel (Lightroom CC/Mobile), click the "+" icon next to "Presets" and choose "Create Preset." Name it, select the adjustments you want to include, and save.
Are paid presets better than free ones?
Not necessarily. The quality of a preset depends on its creator's skill and intent, not its price. Many free presets offer excellent starting points, while some paid presets may be poorly designed. Evaluate presets based on their effect on your images, not their cost.
What if a preset makes my image look worse?
This is common. Not every preset works for every image. If a preset drastically alters your photo negatively, either undo the application and try a different preset, or reset the image and make manual adjustments. Presets are suggestions, not mandates.